中文 (中国)
 Tiếng Việt
 한국어
한국어
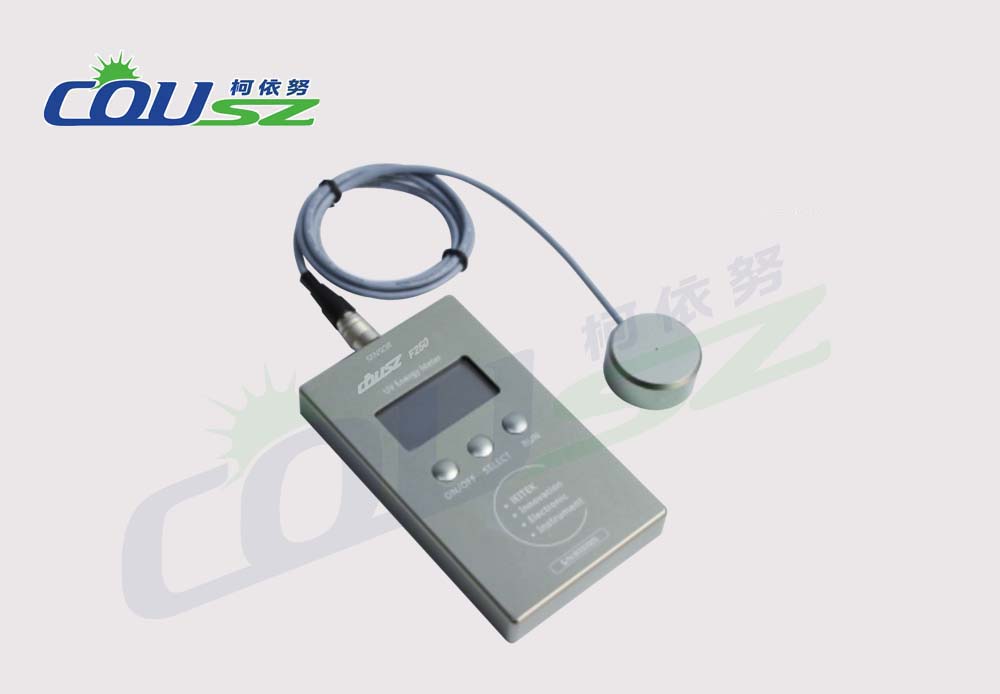
1. What is the overview of the fastcure 150 (f150)?
Before diving deeply into operational mechanics, we must clearly understand the fundamental nature of this instrument. The F150 is a highly advanced UV energy dosimeter designed to measure the total amount of photons contacting a given surface area over a specific exposure period.
Understanding its role in measuring accumulated energy
Unlike basic tools focused solely on instantaneous UV intensity measurement (mW/cm²), the F150 emphasizes the mJ/cm² (milli-joules per square centimeter) metric. According to comprehensive research published by the RadTech Association, accumulated energy is the exact physical quantity that directly dictates the degree of chemical cross-linking of polymers within ultraviolet adhesives and printing inks.
The F150 boasts a broad spectral response ranging from 250nm to 410nm, perfectly covering most of the UVA, UVB, and a portion of the UVC bands emitted by high-pressure mercury vapor lamps. Notably, its peak sensitivity at 365nm makes it an indispensable “assistant” for traditional curing systems. Strictly following the operational steps ensures you accurately identify the aging status of your bulbs and the reflective efficiency of your lamp housings.
2. How to execute the f150 uv radiometer user guide step-by-step?
The operational workflow of the F150 is intentionally streamlined to suit high-speed industrial manufacturing environments. However, simplicity does not mean neglecting strict technical details. Below is the standard protocol according to the manufacturer’s official recommendations.
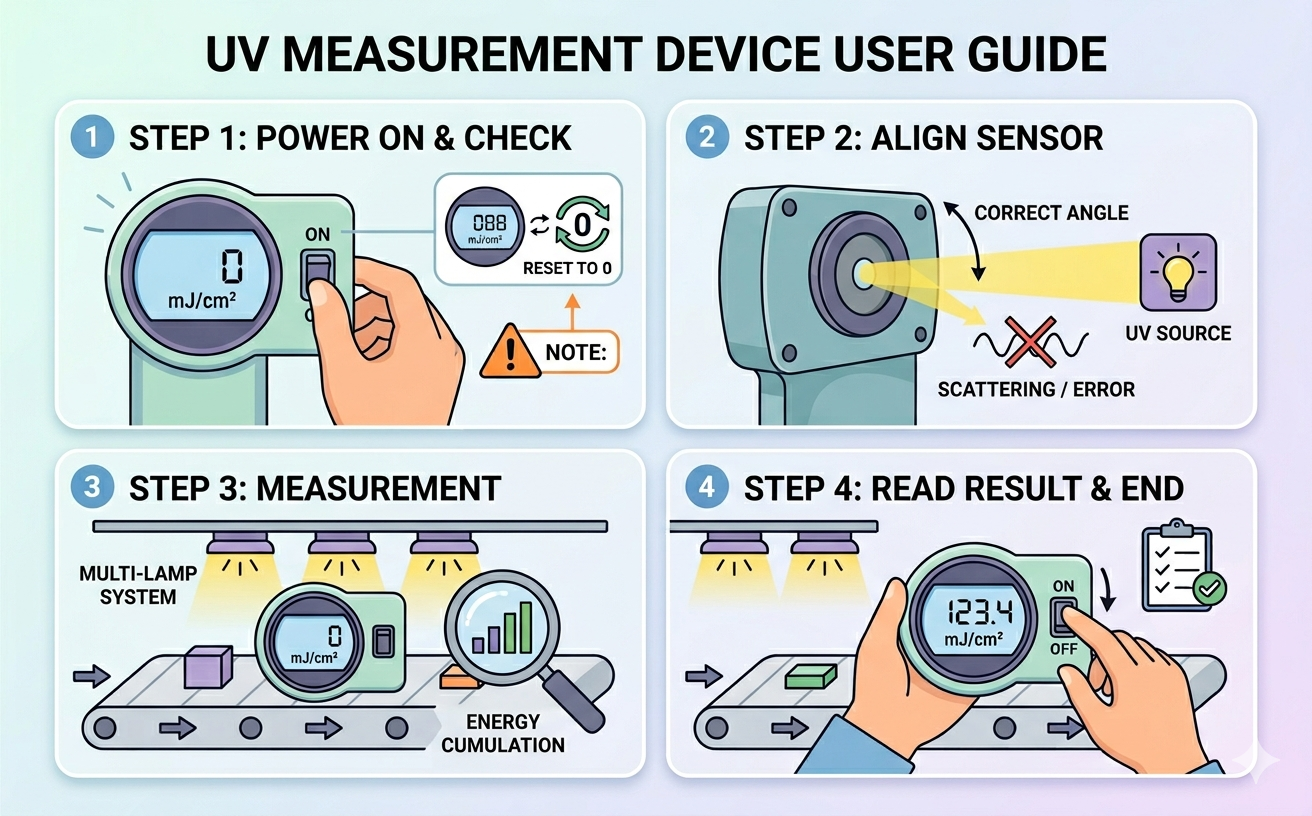
2.1. Step 1: Booting up and checking initial status
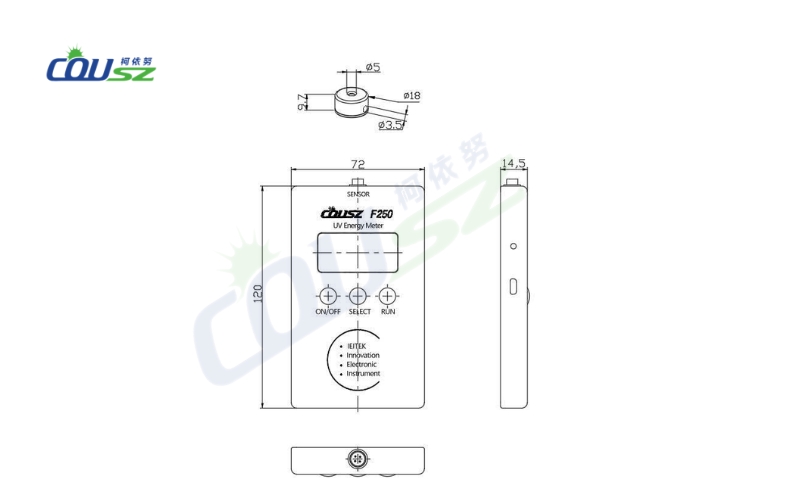
First, adjust the switch located on the right side of the device to the “ON” position. At this moment, the front LCD screen will boot up and display the default value of “0 mJ/cm²”.
Crucial Note: If the screen displays any number other than zero, it means the data from the previous measurement is still stored in the memory buffer (because the device was not fully shut down). In this scenario, according to the standard F150 UV radiometer user guide, you must toggle the switch to “OFF” and then back to “ON” to reset the memory to zero before proceeding.
2.2. Step 2: Setting the measurement direction (sensor positioning)
On the back of the F150 lies the optical sensor surface—the most sensitive component of the entire instrument. When taking a reading, you must direct this sensor surface perfectly facing the ultraviolet light source. The absolute accuracy of your data heavily depends on the angle of incidence. If the sensor is tilted, optical scattering occurs, leading to severe cosine errors.
2.3. Step 3: Measuring the accumulated energy
Place the radiometer onto the conveyor belt or directly under the light source for a specific duration (corresponding to your product’s actual drying cycle). Continuous UV intensity measurement over time yields the total integrated energy. The official F150 UV radiometer user guide emphasizes that the device will continuously accumulate energy as long as it remains on. This feature is incredibly useful when you need to calculate the combined total energy of a system containing multiple lamps placed in succession.
2.4. Step 4: Reading results and safely shutting down
After the device safely exits the curing chamber, read the accumulated energy value displayed on the LCD screen. Once recorded, immediately flip the switch to the “OFF” position. This is a pivotal step in the F150 UV radiometer user guide to preserve the internal lithium battery’s lifespan and prevent the micro-circuitry from overheating.
3. What are the deep technical specifications from experts?
To properly follow the F150 UV radiometer user guide, operators must deeply comprehend the physical limits of their equipment. Below is the detailed specification table for the Fastcure 150:
| Technical Parameter | Detailed Specification Value |
|---|---|
| Wavelength Range | 250 – 410 nm (Peak sensitivity at 365 nm) |
| Intensity Range | 0 – 5,000 mW/cm² |
| Energy Range | 0 – 999,999 mJ/cm² |
| Maximum Temperature Tolerance | 100°C (Maximum exposure of 10 seconds) |
| Physical Dimensions | Diameter 90 mm, Height 13 mm |
Analyzing the thermal limits
The massive energy measurement range of nearly 1 million mJ/cm² clearly proves the durability of this UV energy dosimeter in heavy-duty drying applications. However, according to extensive research by Professor R.W. Stowe, extreme heat is the absolute number one enemy of optical sensors.
Although the F150 is built to withstand up to 100°C, leaving the instrument inside the oven for more than 10 continuous seconds will inevitably melt the internal solder joints and permanently damage the optical filter glass, causing long-term reading deviations. Therefore, operators must strictly allow the device to cool down completely to room temperature before initiating the next measurement cycle.
4. What are the critical safety and preservation notes?
Owning a premium device is never enough; you must know exactly how to protect it. The F150 UV radiometer user guide does not stop at pressing buttons; it heavily encompasses rigorous storage and safety protocols.
Protecting the optics and the operator
- Avoid strong physical impacts: The internal quartz filters and IC components are extremely sensitive to mechanical vibrations. A seemingly minor drop can misalign the optical sensor axis, introducing errors that are entirely invisible to the naked eye.
- Protect your vision: When operating the device on the factory floor, absolutely never look directly at the active lamps. High-intensity ultraviolet rays will cause severe retinal burns and exponentially increase the risk of skin cancer. Always wear specialized protective goggles.
- Understand the auto-sleep mode: The F150 features smart battery management: after 3 minutes of total inactivity, the system automatically enters sleep mode. To wake it up, simply toggle the switch OFF and ON. This is an important note in the F150 UV radiometer user guide to avoid falsely assuming the machine is broken or dead.
- Sanitize the sensor window: Accurate UV intensity measurement heavily relies on keeping the optics clean. After every shift, use a soft lint-free cloth and specialized isopropyl alcohol to gently wipe the back sensor surface. Dust particles or ink smudges on the glass are the leading causes of artificially low measurement results.
5. Why is the annual calibration cycle strictly required?
Why does COUSZ strongly recommend recalibration exactly once every 12 months? Every single electronic component and optical semiconductor inevitably suffers from material aging under the relentless bombardment of high-energy photons—a physical phenomenon known as “Solarization.”
Preventing solarization data drift
Without annual UV equipment calibration, the numbers on your LCD screen will lose all metrological value and no longer reflect the true power of your lamps. Maintaining a strict schedule for UV equipment calibration is the only scientifically proven way to successfully pass the rigorous quality control audits demanded by international manufacturing partners.
Adhering to the F150 UV radiometer user guide alongside tracking your calibration schedule ensures peak operational performance. COUSZ provides a comprehensive 1-year genuine warranty for the F150, acting as a solid testament to the brand’s unwavering commitment to industrial durability.
6. Where to get technical consultation for your curing system?
If you have any further questions regarding the operation of your measurement tools, or if you need to request an official factory calibration certificate for your F150 device, do not hesitate to contact our expert engineering team. For a broader perspective on managing your entire metrology ecosystem, please read our comprehensive UV meter guide A to Z for accurate measurement in industrial applications.
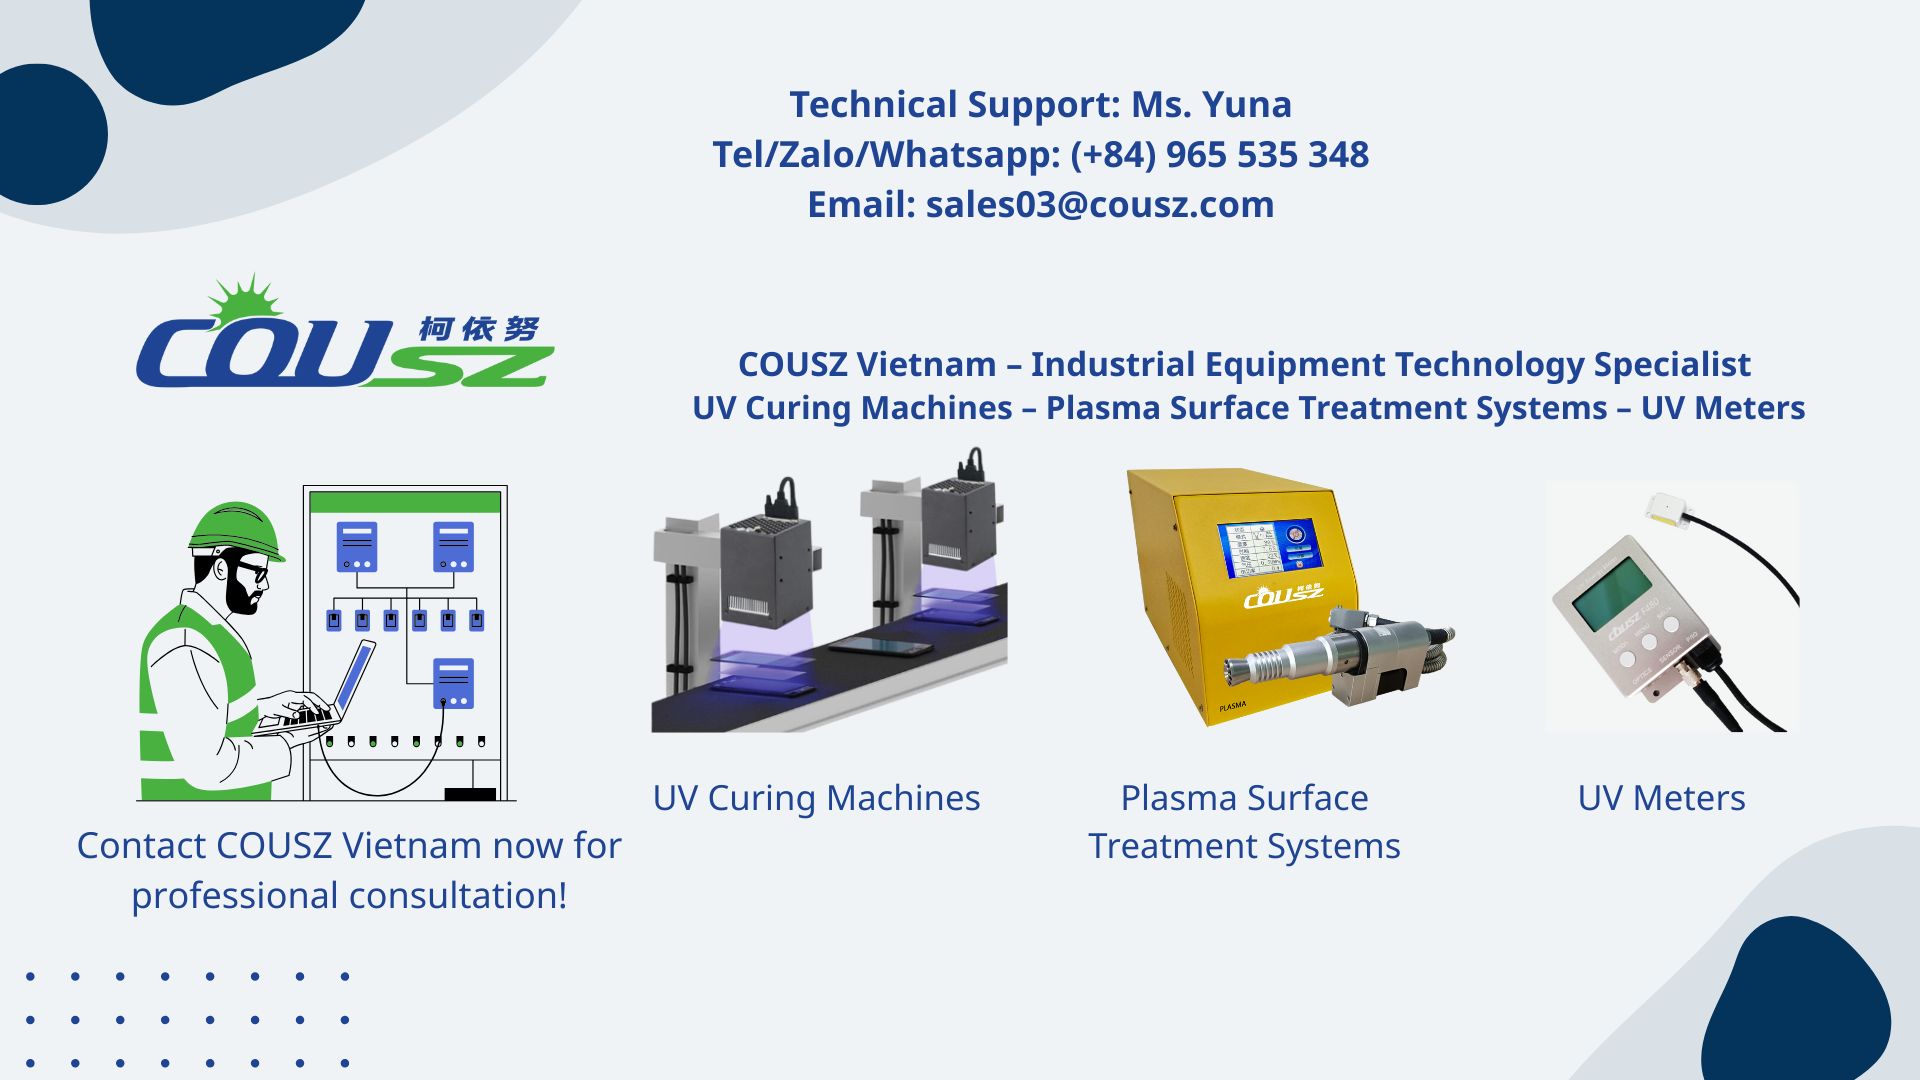
👤 Ms. Yuna
✨ Technical Specialist – COUSZ Vietnam
📞 Tel/Whatsapp/Wechat/Zalo: (84) 965 535 348
📧 Email: sales03@cousz.com
🌐 Website: www.cousz-vn.com
7. Faqs – frequently asked questions about operating the f150
7.1. Why doesn’t the f150 screen display zero when turned on?
This occurs when the device hasn’t been completely reset from the previous recording session. According to the F150 UV radiometer user guide, you simply need to flip the switch to “OFF” and then back to “ON” to clear the internal memory buffer and reset the value to zero before initiating a new pass.
7.2. Can the f150 be used to measure a 395nm led lamp?
The F150 possesses a spectral range of 250-410nm, so theoretically, it can capture the 395nm wavelength. However, because its peak sensitivity is specifically tuned to 365nm (ideal for mercury lamps), using a broad-spectrum UV energy dosimeter on a narrow LED source will result in a specific error margin. You should consult COUSZ technicians for proper multiplier adjustments.
7.3. How do i know when the battery is running low?
When the power is critically low, the LCD screen will appear noticeably dim, or the device will fail to boot up to a stable zero value. The instrument uses three 6V lithium batteries boasting a lifespan of up to 10,000 hours. Always remember to turn off the power after your shift to conserve energy.
7.4. What happens if the device stays in the oven for more than 10 seconds?
The accumulated internal temperature will rapidly exceed the 100°C threshold, which can catastrophically melt the solder joints or permanently blind the optical sensor. The manual strictly limits exposure to a maximum of 10 seconds. If your conveyor belt runs extremely slowly, you must utilize an additional specialized thermal protection shield.
7.5. Can i perform calibration myself at the factory?
No. Executing a proper UV equipment calibration requires a standardized NIST-traceable light source and a highly precise master reference radiometer. You must send the device back to the authorized supplier or a certified metrology laboratory annually to comply with ISO standards and ensure absolute data reliability.